.svg)


Note: The API used by this tutorial is deprecated. To use the new API, please refer to the official documentation: https://docs.giskard.ai
🔥 Training and testing a PyTorch model
Have you ever spent hours training a PyTorch model, only to realize you made a mistake? Or have you ever gotten decent results from your model, but you are not sure if it is because you built the model correctly or just because deep learning is so powerful that even a flawed architecture can produce acceptable outcomes? AI is not perfect. This trade-off is something to be aware of, especially when considering the limitations of AI and its suitability for various problems. However, AI has become increasingly practical and is helping us to solve a wide range of complex problems that were previously considered almost impossible.
Training a PyTorch model can be a time-consuming process, so it is frustrating when you realize you made a mistake in the code. It is also hard to know if your model is truly effective, or if it is just luck that it's producing good results. To ensure your model will work well on new data, it is important to test it and compare the accuracy and loss to the values you saw at the end of training. If there's a significant difference, it could mean the model is overfitted to the training data and may not perform well on unseen data.
Giskard is a tool designed to address some of the challenges of working with AI. It allows you to quickly test your model to make sure there are no biases and errors in your model. In this tutorial, we will guide you through how to use Giskard, with code examples showing you how to upload a PyTorch model built from scratch and a fine-tuned pretrained model to Giskard for analysis to find edge cases and bugs.
⏪ Before loading your PyTorch model
You’ll need to have Git and Docker installed. To get started, follow these installation instructions to install the Giskard Python library.
🏃Build a PyTorch model and analyse it with Giskard
If you have a model which was built from scratch, there is a chance that it contains performance issues and edge cases. Giskard helps to detect problems related to model performance, robustness, discriminative behaviour, etc.
Below are the steps to build, scan and upload a PyTorch model, which based on the content of the news classifies their category.
1. Data preparation
2. Wrap a dataset with Giskard
We need to wrap a dataset with giskard.Dataset. This wrapper allows to perform model scanning on a given data.
3. Build your PyTorch model
4. Define a prediction function
In order to encapsulate the prediction logic, we need to put it inside a "prediction_function", which will be used to infer the predictions during the analysis with Giskard.
5. Wrap your model with Giskard
Same as with wrapping the dataset, we need to wrap the model to perform an analysis using the Giskard framework. This is done via the giskard.Model wrapper.
6. Scan your model with Giskard
Now that we are all set to analyse trained model, we will use giskard.scan to find problematic issues.
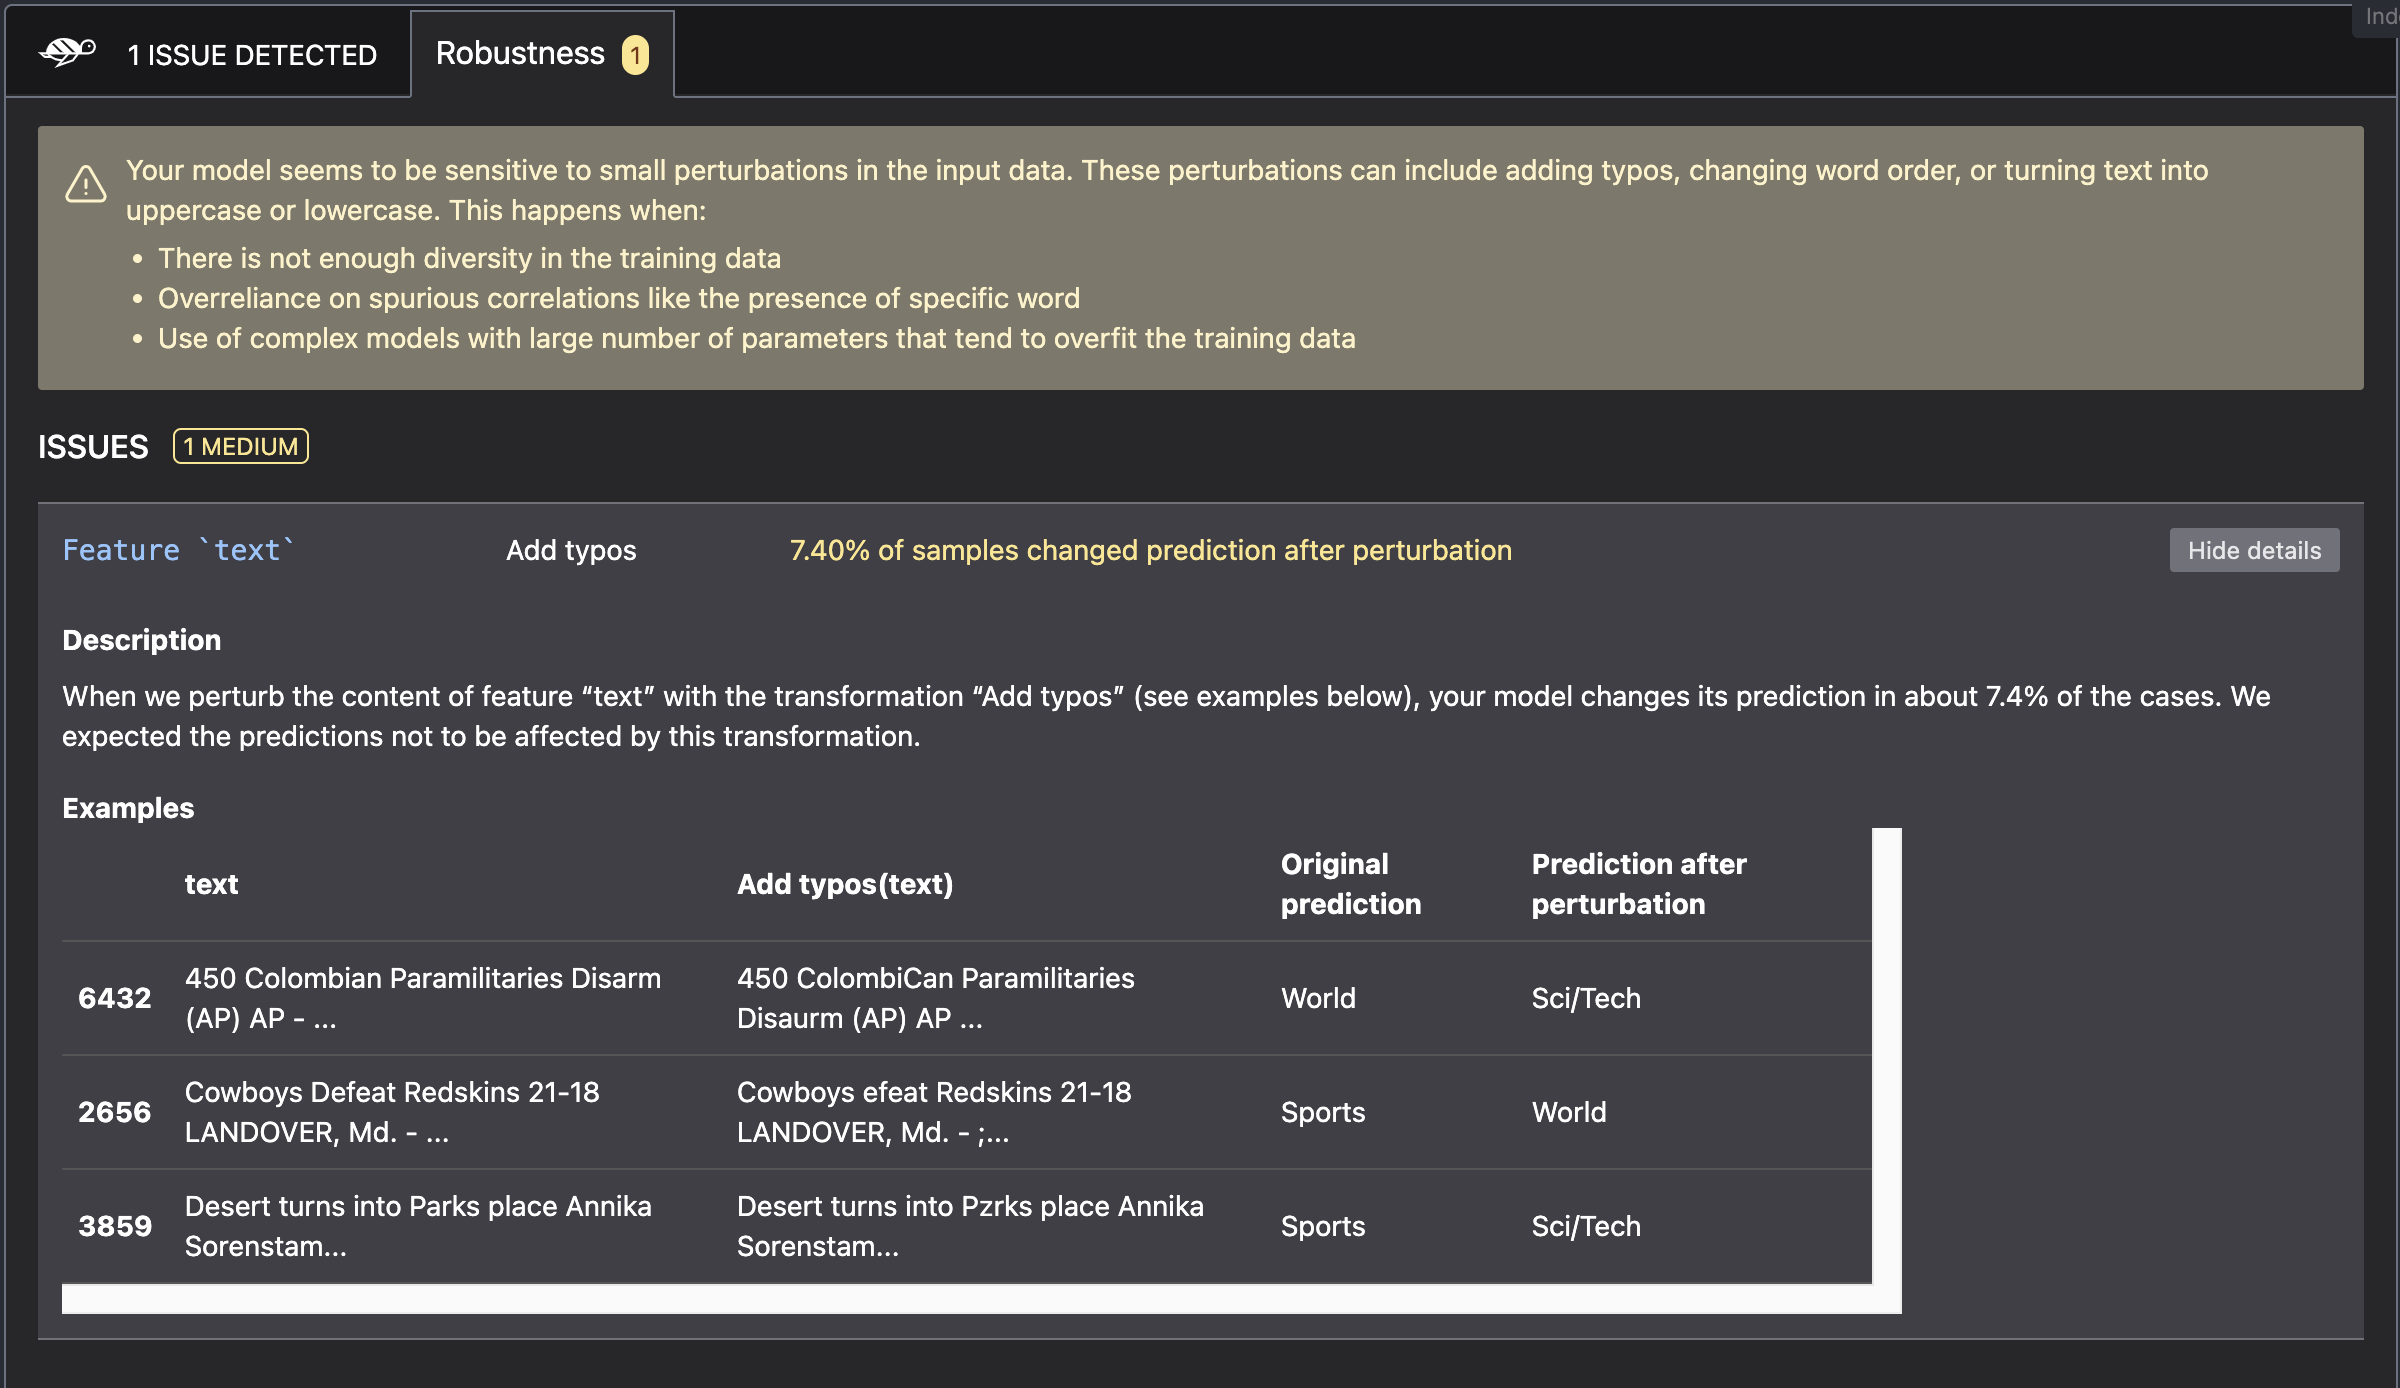
7. Generate tests based on the scanning results
Giskard allows to build a set of tests, called "test-suite", based on detected issues. Thus user can easily check, if the changes he applied in the new version of a model helped to resolve the detected problems:

🔍 Further analysis with Giskard UI
Additionally to the Giskard Python library, the Giskard server is the app that you can install either locally or on your cloud instance. It provides a convenient UI to debug tests, compare models, collaborate with other users, etc. To learn more about its functionality check the documentation.
1. Setup the Giskard server
First we need to start the giskard server via the CLI:
2. Start the Giskard worker
Next, we need to setup the giskard worker. This is the machine, which executes test-suites and dataset inspection.
3. Upload your model and dataset to the Giskard server
Now, we are all set to upload the necessary artefacts, including dataset, trained model and generated test suite to the Giskard UI:
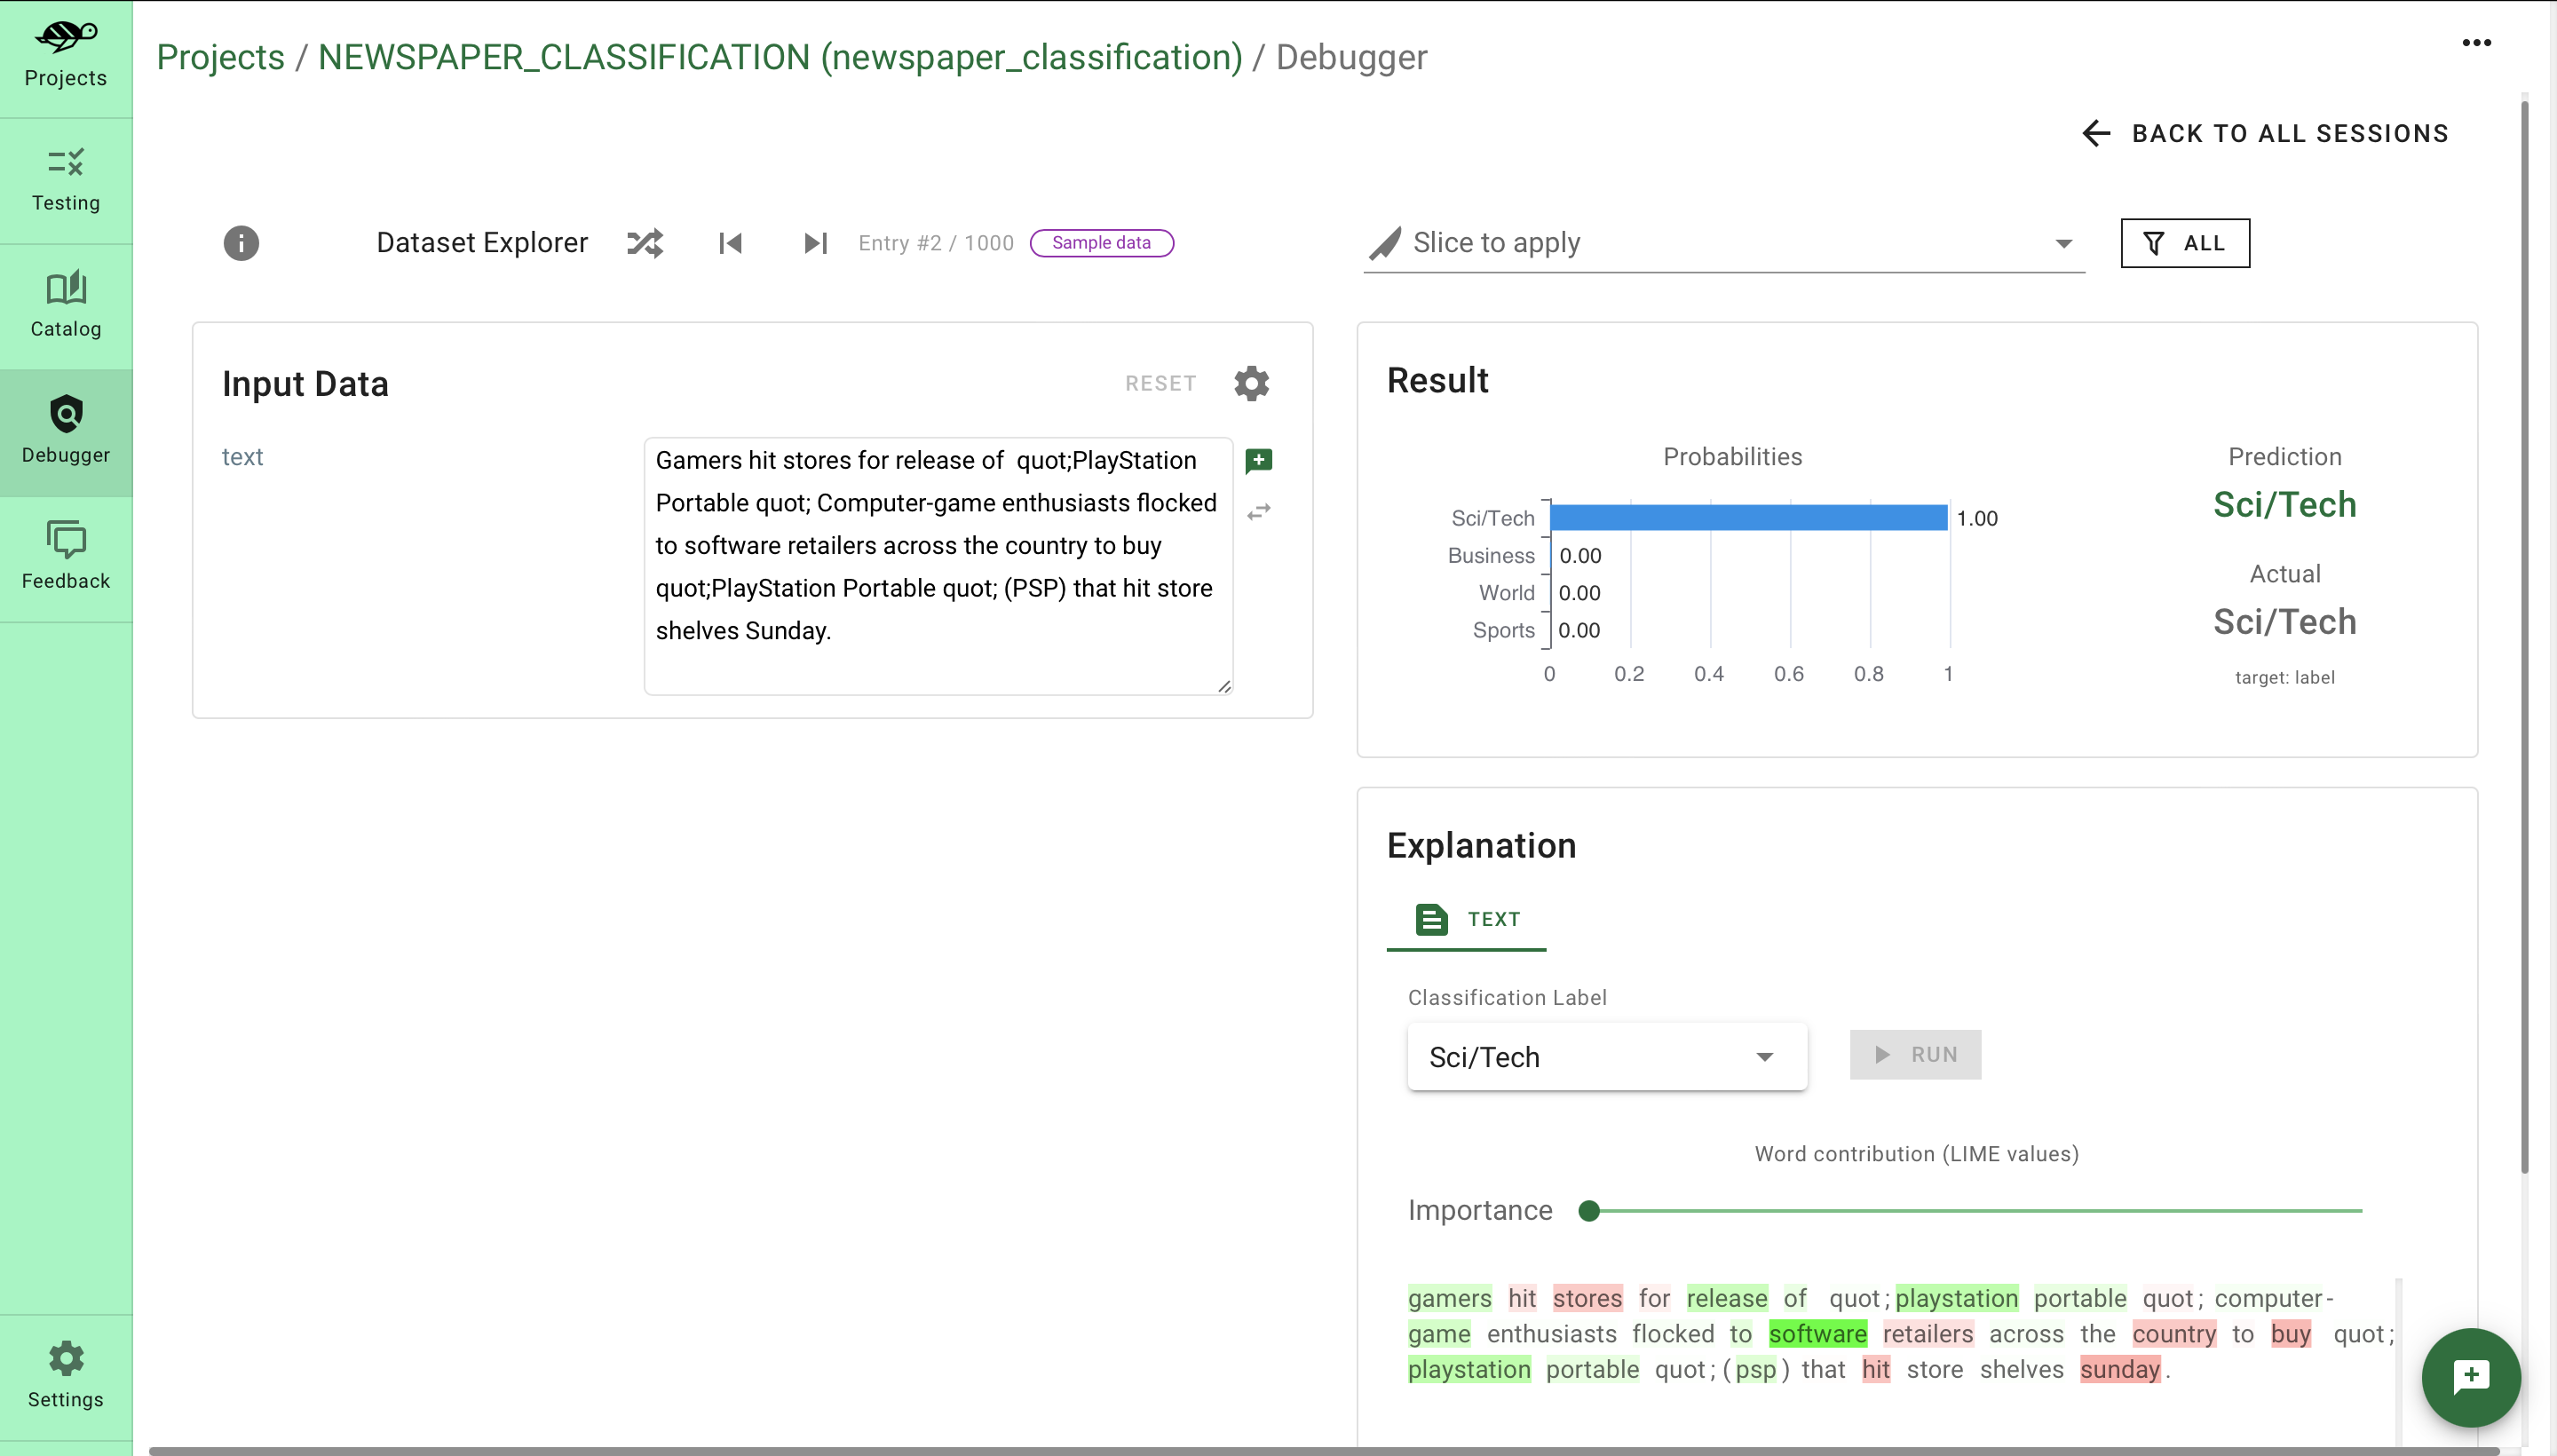
4. Debug your model and dataset
With the Debugger you can conveniently analyse each prediction. You can check, if it is correct or not, and analyse the features contribution to the prediction. You can tweak and change inputs to see how it affects output.
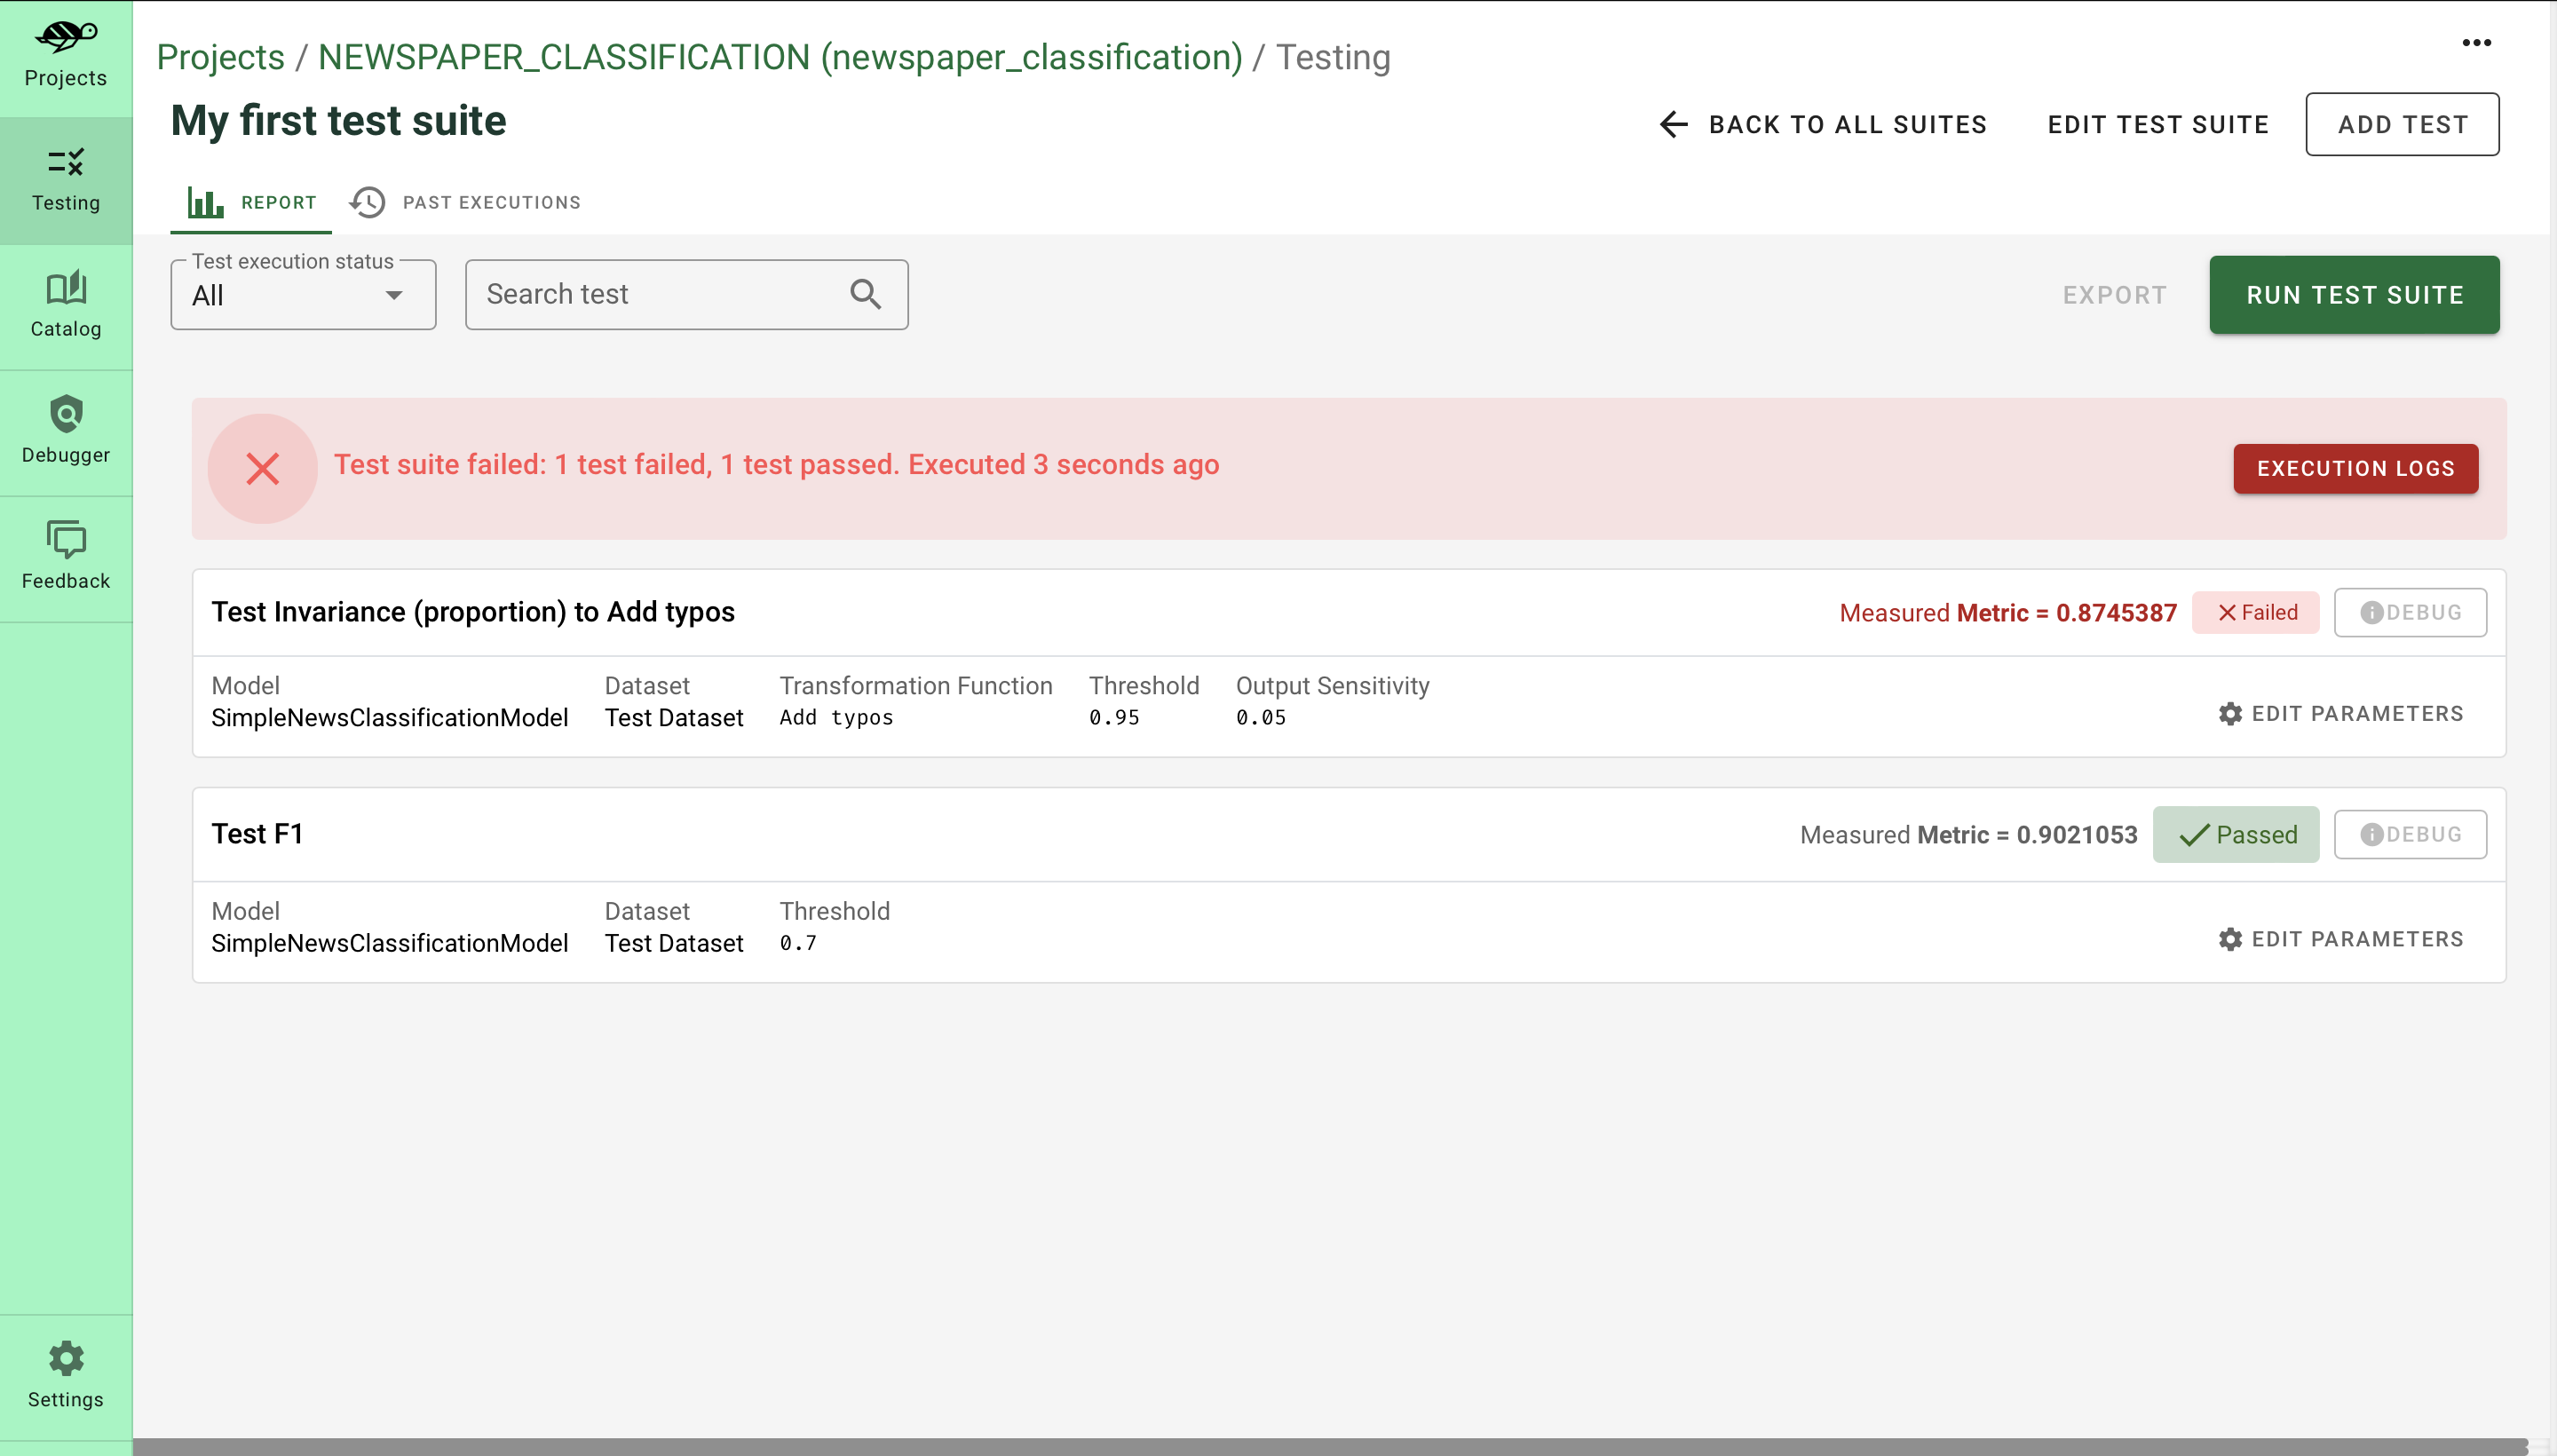
5. Testing
As was stated above, the Giskard UI provides a convenient way to execute test suites. We can modify the uploaded suite by adding new types of tests or create a new one. Giskard provides a wide variety of model's performance tests.
📊 Upload a PyTorch pre-trained model
Fine-tuning adapts a pre-trained model to the new data without training it from scratch. After fine-tuning, you may want to check the model performance and behaviour. This can be done by uploading a fine-tuned model to the Giskard Server to perform inspection and testing routines, described in the previous section.
In this example, we are going to prepare and upload the XLM-ROBERTA model, which is fine-tuned on the SST-2 binary text classification dataset.
1. Data preparation
2. Wrap data with Giskard
3. Build PyTorch model
4. Define prediction function
5. Wrap model with Giskard
6. Upload model and dataset to the Giskard server
As in the previous example, after performing the model scan and test-suite generation, we are ready to upload the fine-tuned model and the dataset to the Giskard Server.
✅ Conclusion
In this article, we demonstrated how simple is to test PyTorch models with the Giskard framework. We demonstrated a full pipeline from creating and scanning model to debugging and testing it on the UI. We hope that you find this article helpful. Happy testing!

.webp)


